- Published on
Data Engineering Zoomcamp, Week 1
Data Engineering Zoomcamp Introduction
The first week of the DataTalksClub Data Engineering Zoomcamp's content revolves around the New York Taxi dataset. This dataset is a fact table containing details about taxi trips, such as trip length, amount, pickup and dropoff locations, dates, etc. Our goal is to set up an environment that allows us to ingest and store this data for later analysis.
- Data Engineering Zoomcamp Introduction
- Pre-requisites
- Docker Services Configuration
- Building a Python Ingestion Script
- Ingesting New York Taxi data into a PostgreSQL Database
Registration Link for Zoomcamp
If you're interested in the Zoomcamp, you can register here, and it's free to participate!
Pre-requisites
You will need to install the following files and tools before we get started.
Setup on Windows: Additional Tools Required
The recommendation is to set up a virtual remote environment to follow along with the Zoomcamp, but I opted instead to use my personal Windows 11 machine. If you choose to do this, it will require you to install some additional tools in order to complete the module:
- Git for Windows
- WSL
- In order to install Docker on windows you will need to install Windows Subsystem for Linux (WSL) and enable Hyper V in the Windows Features
Git for Windows includes Git Bash, which we will be running the majority of our commands on.
Important: For certain Docker commands, you will need to prefix the command in Git Bash with winpty, which ensures proper handling of the terminal I/O, making it possible to interact with Docker containers as intended. The necessity of the command may vary, but if you are having issues running a docker command in the Git Bash terminal, try prefixing it with winpty.
Docker Services Configuration
Before ingesting our data into a PostgreSQL database, we need to configure and start instances of both pgAdmin (database explorer) and PostgreSQL. We have two goals:
- Setup a docker network so our application services can communicate
- Enable our newly ingested data to be persistent across container runs (in other words, our data does not get deleted after exiting our container)
In the Zoomcamp, we start by running each service independently with multiple docker commands. I am skipping ahead here and using docker-compose to set up both with a single command, as it is more efficient.
Docker Compose Setup for pgAdmin and PostgreSQL
Docker Compose is a tool for defining and running multi-container Docker applications. It uses a YAML file to configure application services, streamlining the deployment and networking of interconnected containers. The contents of your docker-compose.yml should look as follows:
services:
  pgdatabase:
    image: postgres:13
    environment:
      - POSTGRES_USER=root
      - POSTGRES_PASSWORD=root
      - POSTGRES_DB=ny_taxi
    volumes:
      - "/ny_taxi_postgres_data:/var/lib/postgresql/data:rw"
    ports:
      - "5432:5432"
  pgadmin:
    image: dpage/pgadmin4
    environment:
      - PGADMIN_DEFAULT_EMAIL=admin@admin.com
      - PGADMIN_DEFAULT_PASSWORD=root
    volumes:
      - "./pgadmin_data:/var/lib/pgadmin:rw"
    ports:
      - "8080:80"
Running docker compose up after configuring your docker-compose.yml file should result in two containers, one with PostgreSQL and the other with pgAdmin, that are now able to communicate. For example, you should now be able to query your database via the pgAdmin GUI.
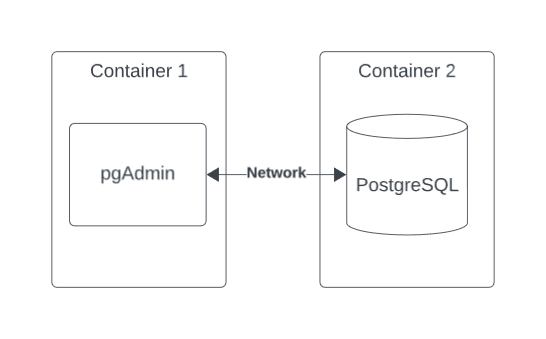
Docker Network Considerations
It is important to note we did not define a Network in our docker-compose.yml file. Docker Networks allow our services to communicate. Therefore, Docker Compose by default will create one for you which name is derived from the folder/directory the docker-compose.yml file is located in. You can run the command docker network ls and it will list all the networks, including your default one. For example, my docker-compose file was in my directory titled my_week_1, therefore the network is titled my_week_1_default. Try running docker network ls and see for yourself. You can also define the network name within docker compose as well if you'd prefer.
Understanding Docker Volumes
To keep our newly ingested data persisitent across container runs, it is important that we map the volume in our docker compose file.
pgadmin_data is the name I gave to our specific volume. You can name it however you'd like. pgAdmin writes various types of data to this directory. This data includes:
- Session Data: Information about user sessions, such as login sessions.
- Configuration Data: User preferences and settings for the PgAdmin application.
- Connection Data: Information about database connections, including server, database, and user details.
This allows data such as server, database, and user details to be remembered and automatically loaded when you access PgAdmin again via the browser.
The pgadmin_data volume is separate from your PostgreSQL volume ny_taxi_postgres_data. The PostgreSQL volume is used to persist data from your PostgreSQL database, while the pgadmin_data volume is used to persist data from your pgAdmin application.
Now, lets start up our services by running:
docker compose up
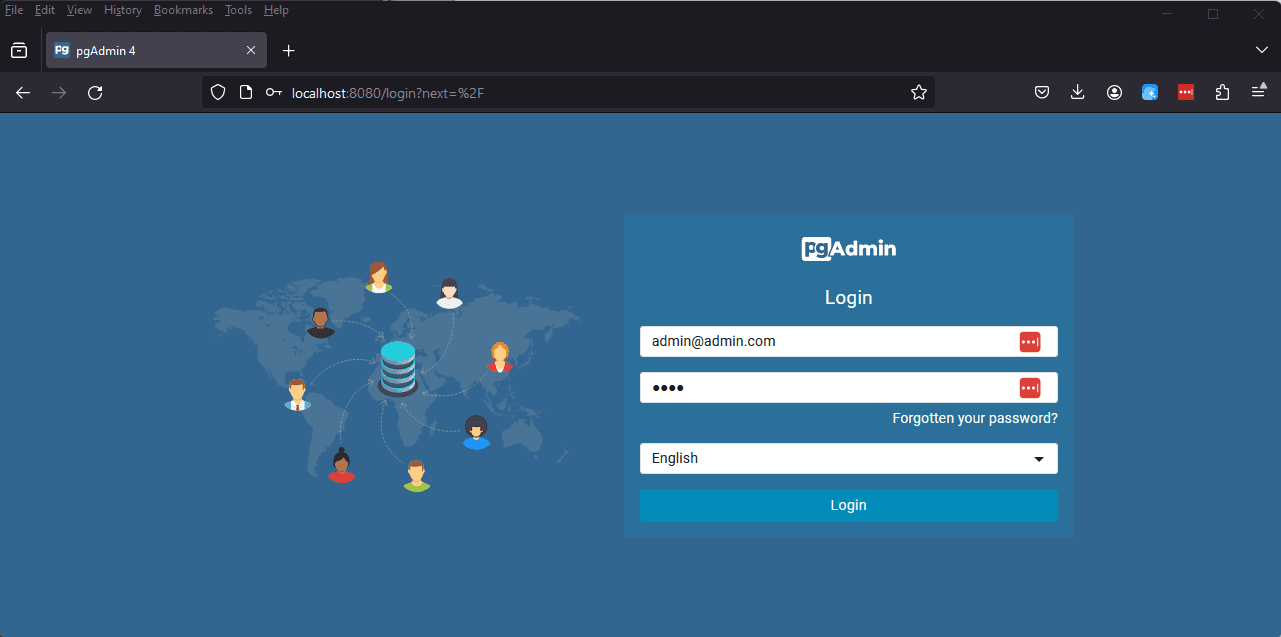
Next, you'll open up your web browser and go to localhost:8080/ and use the credentials we defined in our docker-compose.yml file to login. Remember, 8080 is the port we defined for pgAdmin to run on.
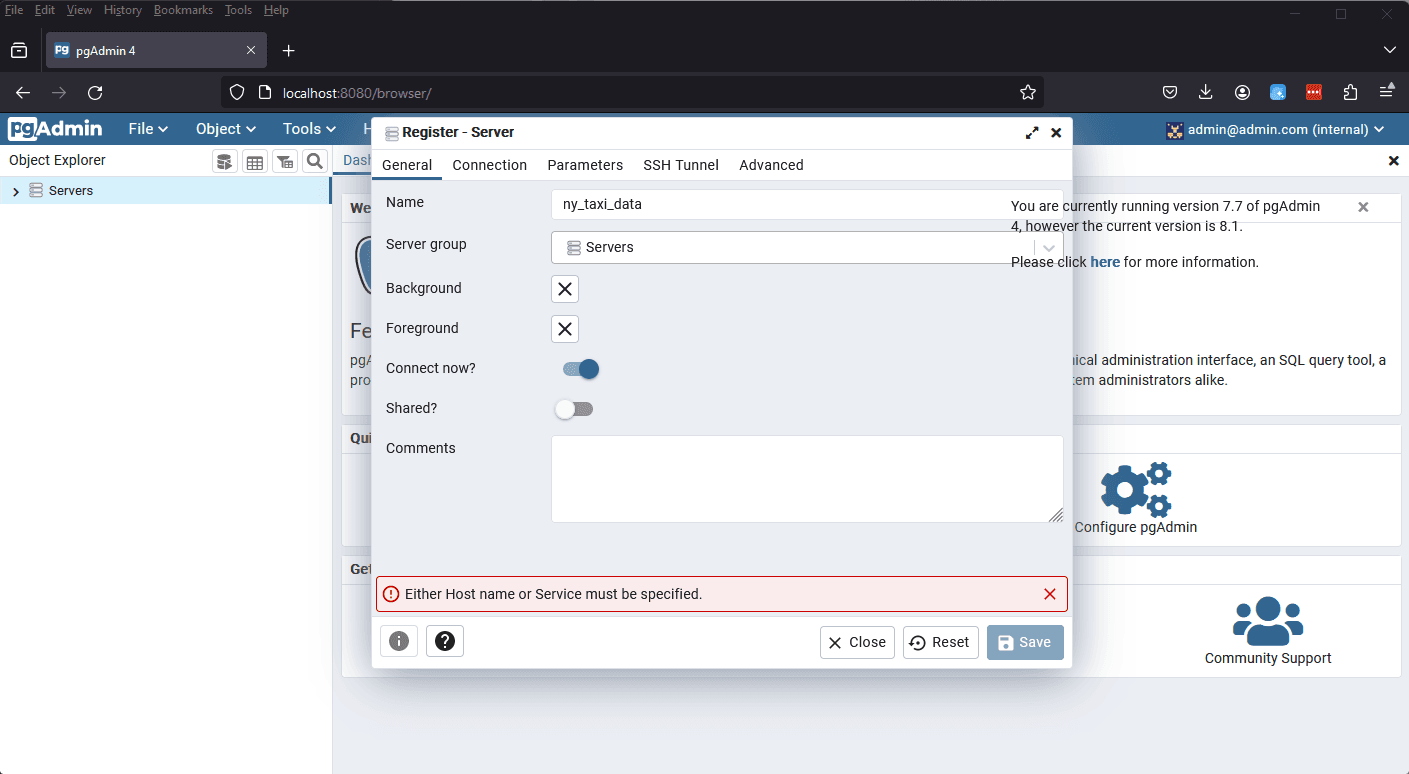
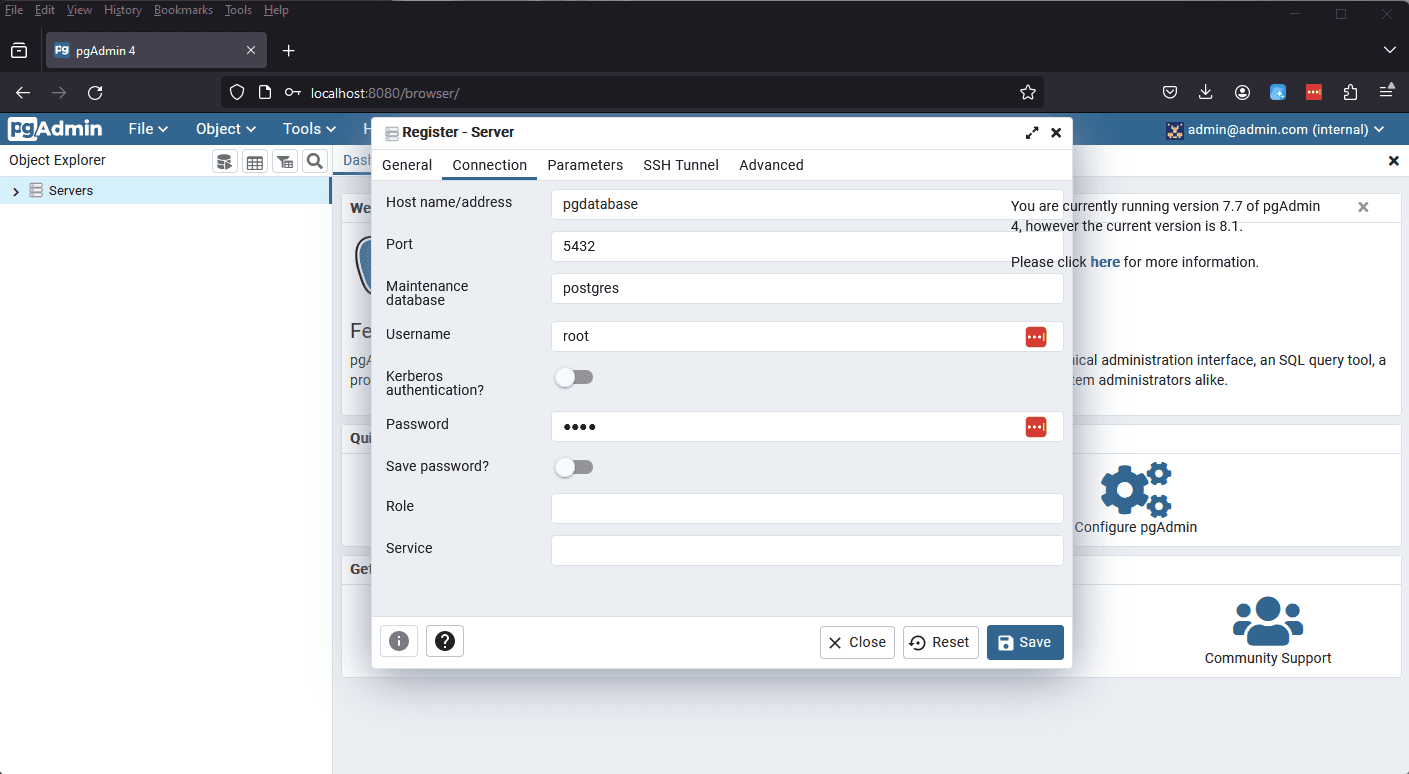
Now that we've registered our server, we can demonstrate how our connection details remain after we exit our docker container.
In you're terminal where you last ran docker compose up, use the command CTRL + C to exit the container. Now run the container again, and you should notice a slight difference. We are now being prompted to enter our password for our previously defined connection. This shows how our previously saved connection details remained across container runs. This is because we enabled a pgAdmin volume in our docker-compose.yml file.
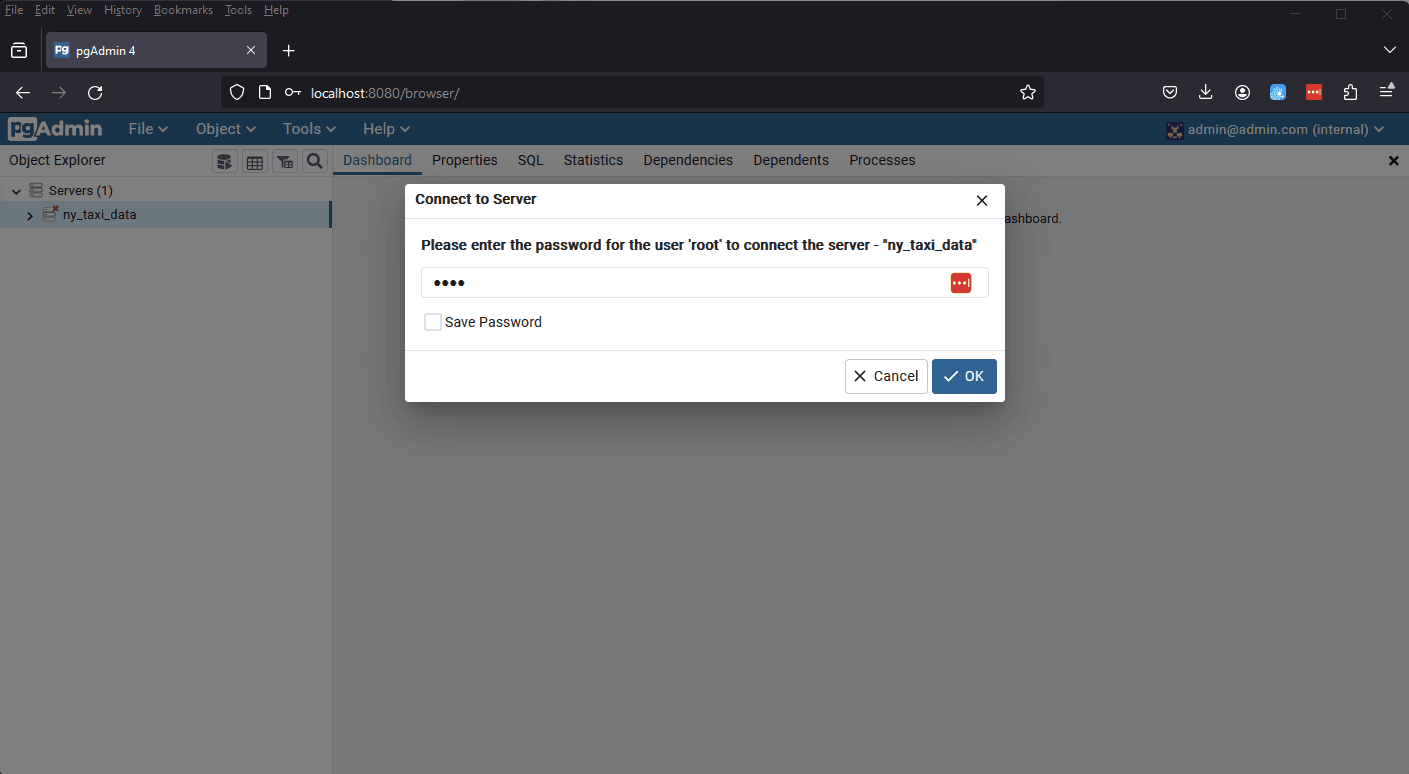
Building a Python Ingestion Script
Before we get into the actual code, I'd like to break down some of the libraries we are using. We utilize the pandas library to read our CSV file as well as to insert our data into our database. sqlaclehmy is used to instantiate a sql engine that allows us to connect to our database, prior to performing the insert. The argparse library allows us to pass parameters such as the URL of our CSV file, our database name, our database credentials, etc. into our script via the Git Bash terminal. I'll demonstrate further in the next section. Lastly, we use a for loop to iterate (step through) our taxi dataframe and insert that data into our database.
You might ask why we are using a for loop rather than just inserting all the data at once. The answer is we are utilizing a concept known as "chunk sizing," which breaks a large dataframe into multiple smaller pieces. For example, say we have a dataframe with 1,000,000 records. With chunk sizing, we split that dataframe into 10 pieces, 100,000 records each and insert them sequentially using a for loop. This is better for memory management and is often more effecient when handling larger datasets.
import argparse
import pandas as pd
import os
import pyarrow.parquet as pq
from sqlalchemy import create_engine
from time import time, sleep

def main(params):
    user = params.user
    password = params.password
    host = params.host
    port = params.port
    db = params.db
    table = params.table
    url = params.url
    file_name = url.split('/')[-1]

    # download csv from URL using wget
    os.system(f'wget {url} -O {file_name}')

    # postgresql://root:root@localhost:5432/ny_taxi
    engine = create_engine(f'postgresql://{user}:{password}@{host}:{port}/{db}')

    if file_name.endswith('.parquet'):
        pf = pq.read_table(file_name)
        data = pf.to_pandas()
    elif file_name.endswith('.csv') or file_name.endswith('.csv.gz'):
        data = pd.read_csv(file_name, compression='infer')
    else:
        print(f'Unsupported file format: {file_name}')
        return

    df_len = data.shape[0]

    # Data Definition Language (DDL): defines the schema
    print(pd.io.sql.get_schema(data, name='yellow_taxi_data', con=engine))

    chunk_size = 100000
    chunk_count = 0
    chunks = [data.iloc[i:i+chunk_size] for i in range(0, len(data), chunk_size)]

    for df in chunks:
        chunk_count += chunk_size
        if chunk_count >= df_len:
            completion = 100
        else:
            completion = (chunk_count/df_len) * 100
        t_start = time()
        df.to_sql(name=table, con=engine, if_exists='append')
        t_end = time()
        print(f'inserted another chunk, took {(t_end-t_start):.3f} seconds. {completion:.3f} % Complete.')

if __name__ == '__main__':

    parser = argparse.ArgumentParser(description='Ingest CSV data to Postgres')

    #password, host, port, database name, table name, url of the csv

    parser.add_argument('--user', help='username')
    parser.add_argument('--password', help='password')
    parser.add_argument('--host', help='hostname')
    parser.add_argument('--port', help='port number')
    parser.add_argument('--db', help='database name')
    parser.add_argument('--table', help='name of the tabler')
    parser.add_argument('--url', help='url of the csv')

    args = parser.parse_args()

    main(args)
Ingesting New York Taxi data into a PostgreSQL Database
Now that we have written our ingestion script, the next step is to configure our Dockerfile before we can actually run the script and ingest our data into our database. In the Dockerfile below. Let's define our Dockerfile below:
FROM python:3.9.1

run apt-get install wget
RUN pip install pandas sqlalchemy psycopg2 pyarrow wheel

WORKDIR /app
COPY ingest_data.py ingest_data.py
COPY ingest_taxi_zone_data.py ingest_taxi_zone_data.py

ENTRYPOINT ["python", "ingest_data.py"]
#ENTRYPOINT "bash"
Lets break down this Dockerfile. Firstly, we are using the base image for python version 3.9.1, which is essentially a pre-built python environment that will be installed & ready to use in our container.
Secondly, we are installing wget, a utility for downloading files for the web. If you recall back to our ingestion script, you'll notice we used wget to download our CSV file.
Next, we are using pip (a python library to install packages) to install the libraries we need for our ingestion script to run, such as pandas, sqlaclhemy, etc.
The command WORKDIR /app is setting our working directory to /app
The COPY command is copying our ingestion script from our host machine to the container's working directory /app.
Lastly, ENTRYPOINT is used to set the default state in which the container executes. In our case, when we run our docker image, it will execute python ingest_data.py. You'll notice ENTRYPOINT "bash" has been commented out. ENTRYPOINT "bash" would start our terminal in our working directory, /app rather than executing our python script.
Now that we have defined the docker file, we must build the docker image. For example, say your directory contains two files /Zoomcamp/Week1/Dockerfile & /Zoomcamp/Week1/ingest_data.py. You will then want to open a Git terminal in the /Zoomcamp/Week1/ directory and run the following:
docker build -t taxi_ingest:v001 .
Don’t forget to add a . at the end of the command which means we want to use the Dockerfile in the current directory.
taxi_ingest is the name of the image and v001 is the tag we've defined.
Now that the image is built, it is time to run our pipeline script. You must first remember to declare your URL variable from which the data is located.
Use the following commands in a Git Bash terminal to set your URL variable and run your docker container.
export URL="https://github.com/DataTalksClub/nyc-tlc-data/releases/download/green/green_tripdata_2019-09.csv.gz"
winpty docker run -it \
--network my_week_1_default \
taxi_ingest:v001 \
--user=root \
--password=root \
--host=pgdatabase \
--port=5432 \
--db=ny_taxi \
--table=yellow_taxi_data \
--url=${URL}
You will then run the same command, only slightly modified in order to ingest our Taxi Zone data. Replace the table argument with a new table name to represent our taxi_zone_data and change the URL to the location of our zone data.
export URL="https://s3.amazonaws.com/nyc-tlc/misc/taxi+_zone_lookup.csv"
winpty docker run -it \
--network my_week_1_default \
taxi_ingest:v001 \
--user=root \
--password=root \
--host=pgdatabase \
--port=5432 \
--db=ny_taxi \
--table=taxi_zone_data \
--url=${URL}
After running these commands, you should see some logs in the terminal. These are the print statements we defined in our ingestion script.
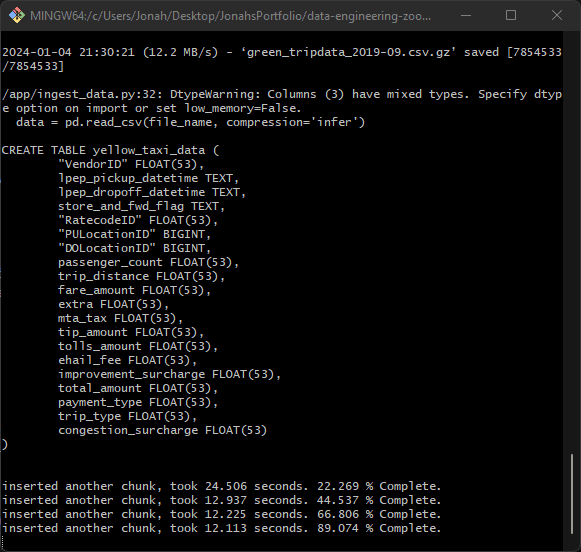
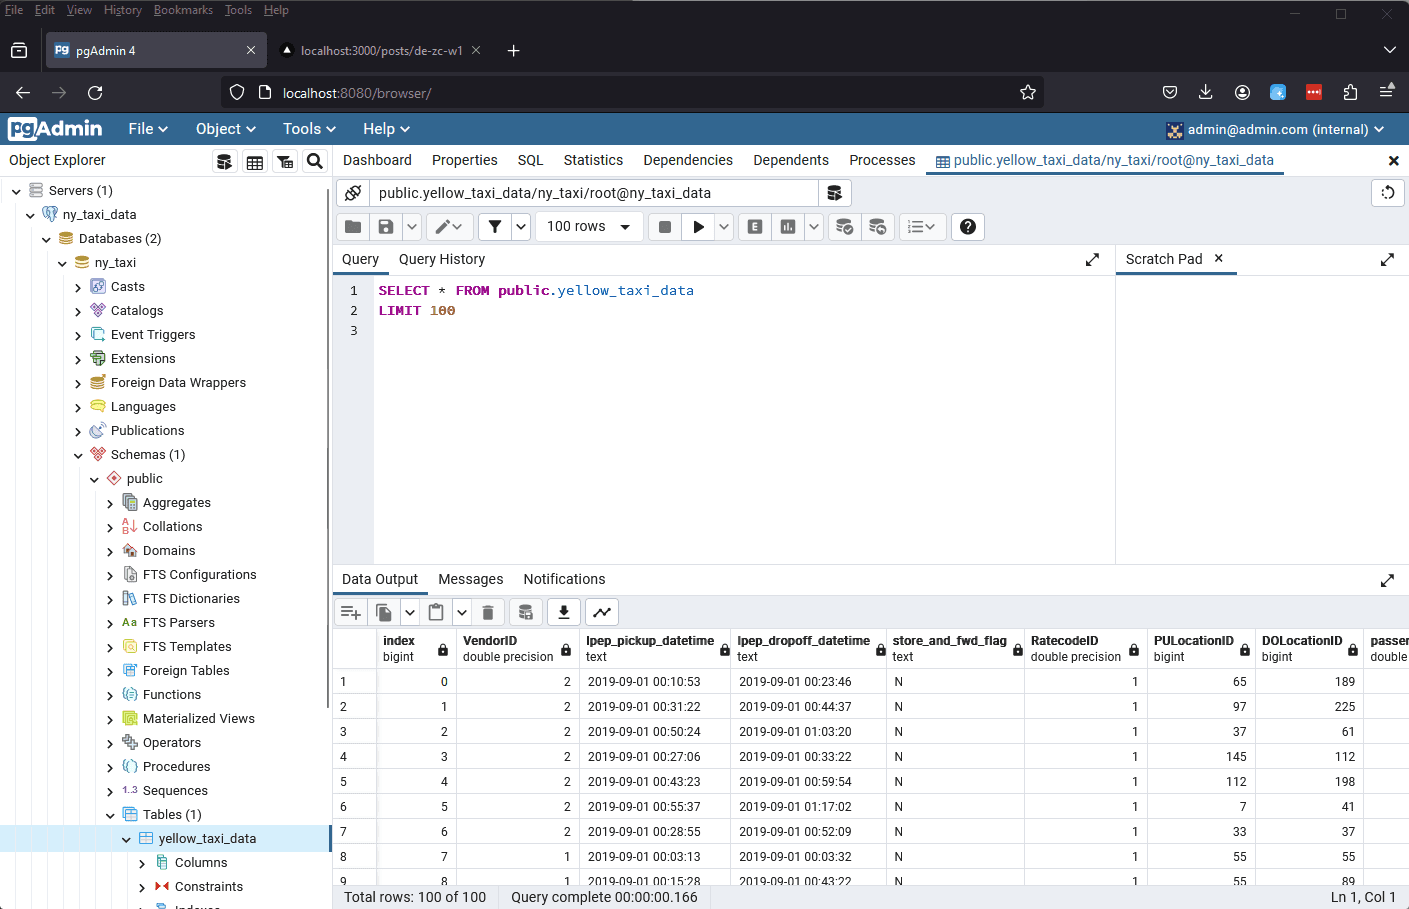
With pgAdmin up in the browser, be sure to refresh the page and you should now see the yellow_taxi_data and taxi_zone_data under Tables in the ny_taxi database.
